
Your entryway is the very first thing you and your guests see the moment you step through the door — yet it’s often the most neglected space in the entire house. A cluttered console table, a pile of shoes by the door, or a bare, forgotten hallway can make even a beautifully decorated home feel unfinished. The good news? Transforming your entryway into a warm, functional, and stylish welcome space doesn’t require a renovation budget or a design degree. With a handful of intentional changes, you can turn that awkward in-between space into the most inviting part of your home.
In this step-by-step guide, we’ll walk through exactly how to assess, declutter, furnish, light, and style your entryway or hallway so it feels like a true extension of your home’s personality. Whether you have a grand foyer or a narrow apartment hallway, these steps are designed to scale to any space.

Step 1: Assess the Space and Declutter Completely
Before you buy a single new item, stand at your front door and really look at your entryway. Is it functioning as a landing pad for mail, keys, shoes, and bags that never seem to find a permanent home? Most entryways suffer from what designers call “drop zone chaos” — a slow accumulation of everyday items that have no designated spot.
Start by removing everything from the space. Sort items into three piles: keep here, relocate elsewhere in the home, and donate or discard. Be honest with yourself about what actually belongs in this high-traffic zone. A good rule of thumb is to keep only the items you use on a daily basis — everyday shoes, a favorite jacket, keys, and perhaps a bag for essentials. Seasonal items like heavy winter coats or beach gear should be stored elsewhere and rotated in as needed.
- Remove all furniture and decor temporarily
- Wipe down floors, baseboards, and walls
- Sort belongings into keep, relocate, and donate piles
- Only reintroduce items that serve a daily purpose
Step 2: Choose a Functional Anchor Piece of Furniture
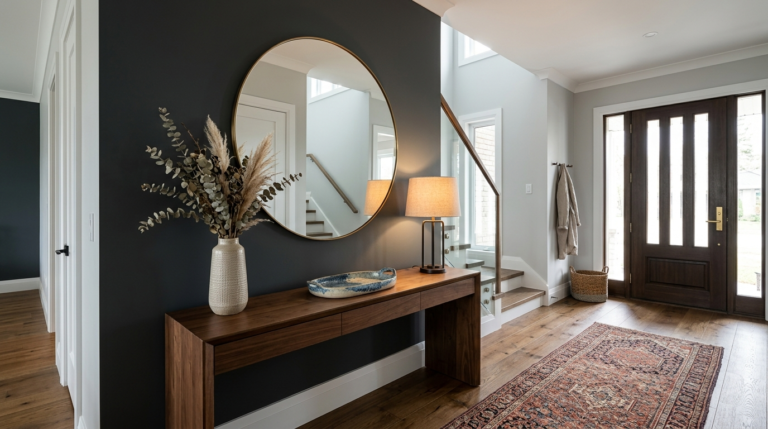
Every great entryway starts with one anchor piece of furniture that sets the tone for the whole space. Depending on your square footage, this could be a slim console table, a bench with storage underneath, or a compact chest of drawers. The key is choosing a piece that’s proportional to your space — a narrow hallway needs a table no deeper than 12 to 14 inches, while a larger foyer can accommodate something more substantial.
If you’re tight on square footage, a wall-mounted shelf or a slim floating console can provide surface area without eating into your walking path. For entryways that double as a mudroom, a bench is invaluable — it gives you a spot to sit while putting on shoes and often includes hidden storage for gloves, scarves, or umbrellas.

Step 3: Add Smart, Concealed Storage Solutions
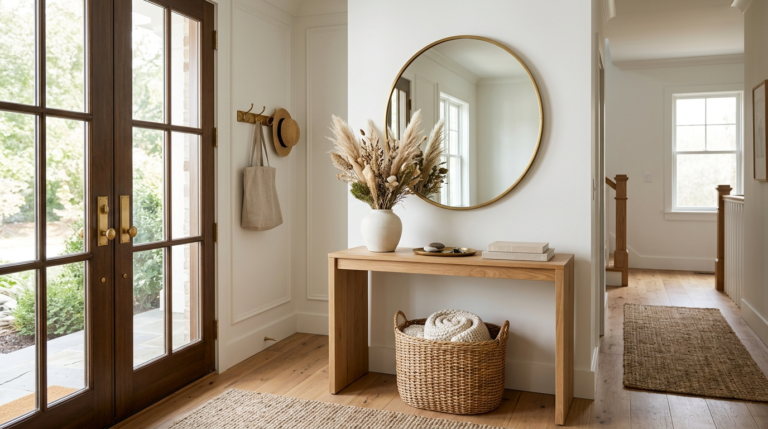
Storage is the backbone of a functional entryway. Without it, even the most beautifully styled space will devolve back into clutter within a week. Think in layers: baskets for shoes, a small dish or tray for keys and loose change, hooks for bags and jackets, and a drawer or box for mail and miscellaneous items.
Wall-mounted hooks are one of the most effective and budget-friendly upgrades you can make. Install them at varying heights so that both adults and children can use them independently. If you have the wall space, a row of hooks paired with a narrow bench creates a mini mudroom effect that dramatically increases the functionality of the space.
- Woven baskets for shoes or outdoor gear
- A lidded box or drawer for mail and keys
- Wall hooks at multiple heights for coats and bags
- A small tray or dish to corral loose items
Step 4: Layer Your Lighting for Warmth and Function
Lighting is one of the most underrated tools in entryway design. A single harsh overhead bulb can make even a well-furnished space feel cold and uninviting. Instead, aim to layer at least two light sources: an overhead fixture for general illumination and a secondary source, like a table lamp or wall sconce, for warmth and ambiance.
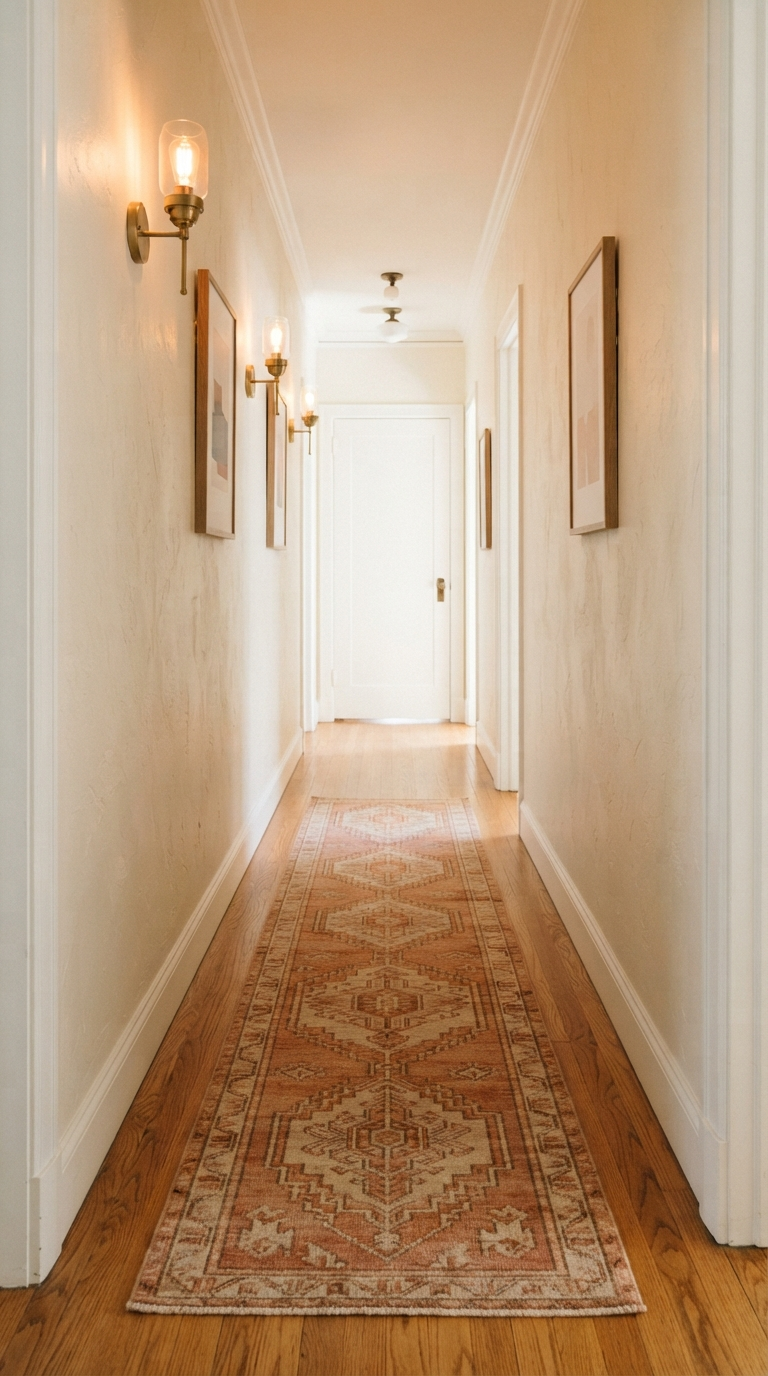
If your entryway lacks natural light, consider a statement pendant or a pair of wall sconces flanking a mirror. Warm-toned bulbs (around 2700K to 3000K) will make the space feel cozy rather than clinical. For hallways, a series of small flush-mount fixtures spaced evenly along the ceiling can eliminate dark, cave-like stretches between rooms.

Step 5: Hang a Mirror to Add Light and Depth
A mirror is arguably the single most transformative addition you can make to an entryway. Beyond the obvious practicality of a last-look check before heading out the door, a well-placed mirror bounces natural and artificial light around the room, making even the smallest entryway feel more expansive.
Choose a mirror that complements the scale of your anchor furniture piece — as a general rule, it should be about two-thirds the width of the console or table beneath it. An arched or organically shaped mirror softens a boxy entryway, while a large round mirror creates a striking focal point above a console table.
Step 6: Ground the Space with a Rug
A durable, textured rug does double duty in an entryway: it defines the space visually and protects your flooring from the daily wear of foot traffic, rain, and mud. Look for low-pile, easy-to-clean materials like wool blends, jute, or indoor-outdoor synthetic fibers that can handle moisture without holding onto stains.
Sizing matters here too. A rug that’s too small will look like an afterthought, while one that’s appropriately sized will anchor your furniture and define the entry as its own distinct zone, even in an open floor plan. In narrow hallways, a runner is the natural choice — leave a few inches of flooring visible on either side for a polished, intentional look.
Step 7: Personalize with Layered Decor
Once the functional bones of your entryway are in place, it’s time to inject personality. This is where the space stops feeling like a generic hallway and starts feeling like *your* home. A curated vignette on your console table — think a textured vase with dried or fresh stems, a small stack of favorite books, and a piece of meaningful art leaning against the wall — instantly elevates the space.
Don’t be afraid of scale here. A single oversized piece of art or a gallery wall running down a hallway can turn a purely functional pass-through into a genuine design moment. Layer in texture through a woven basket, a ceramic bowl, or a small plant that can tolerate lower light conditions, like a pothos or a snake plant.
Step 8: Build in a Simple Maintenance Habit
The final and most overlooked step is maintenance. Even the most beautifully designed entryway will fall apart without a simple daily habit to reset it. Make it a rule that every item has a home, and every family member knows where that home is. Spend two minutes each evening returning shoes to their basket, hanging up jackets, and clearing loose mail from the console.
This small daily reset is what separates a Pinterest-worthy entryway from one that only looks good on move-in day. Consistency, not perfection, is what keeps this high-traffic space feeling calm and welcoming.

Common Entryway Mistakes to Avoid
Even with the best intentions, a few common missteps can undermine your entryway makeover. Watch out for these pitfalls as you finalize your space:
- Overcrowding a small entryway with too much furniture, which restricts natural flow
- Skipping storage and relying only on decorative styling, which leads to clutter creeping back within days
- Choosing a rug that’s difficult to clean, which becomes a maintenance headache in a high-traffic zone
- Ignoring lighting and leaving the space dim and uninviting after dark
- Hanging a mirror or art at the wrong height, disrupting the visual flow of the hallway
Final Tips for a Welcoming Entryway
Remember that your entryway sets the emotional tone for your entire home. A few intentional touches — fresh flowers on rotation, a scented candle ready to light, or a small chalkboard with a family message — can make the space feel alive and lived-in rather than staged. Rotate your decor seasonally to keep the space feeling fresh without requiring a full redesign each time.

Bringing It All Together
An entryway makeover doesn’t have to happen all at once. Tackle these steps one weekend at a time — declutter first, then furniture, then storage, lighting, and finally the personal touches. By the time you’ve worked through this guide, you’ll have a space that not only looks beautiful but actively works for your daily routine, greeting you with calm and warmth every single time you walk through the door.