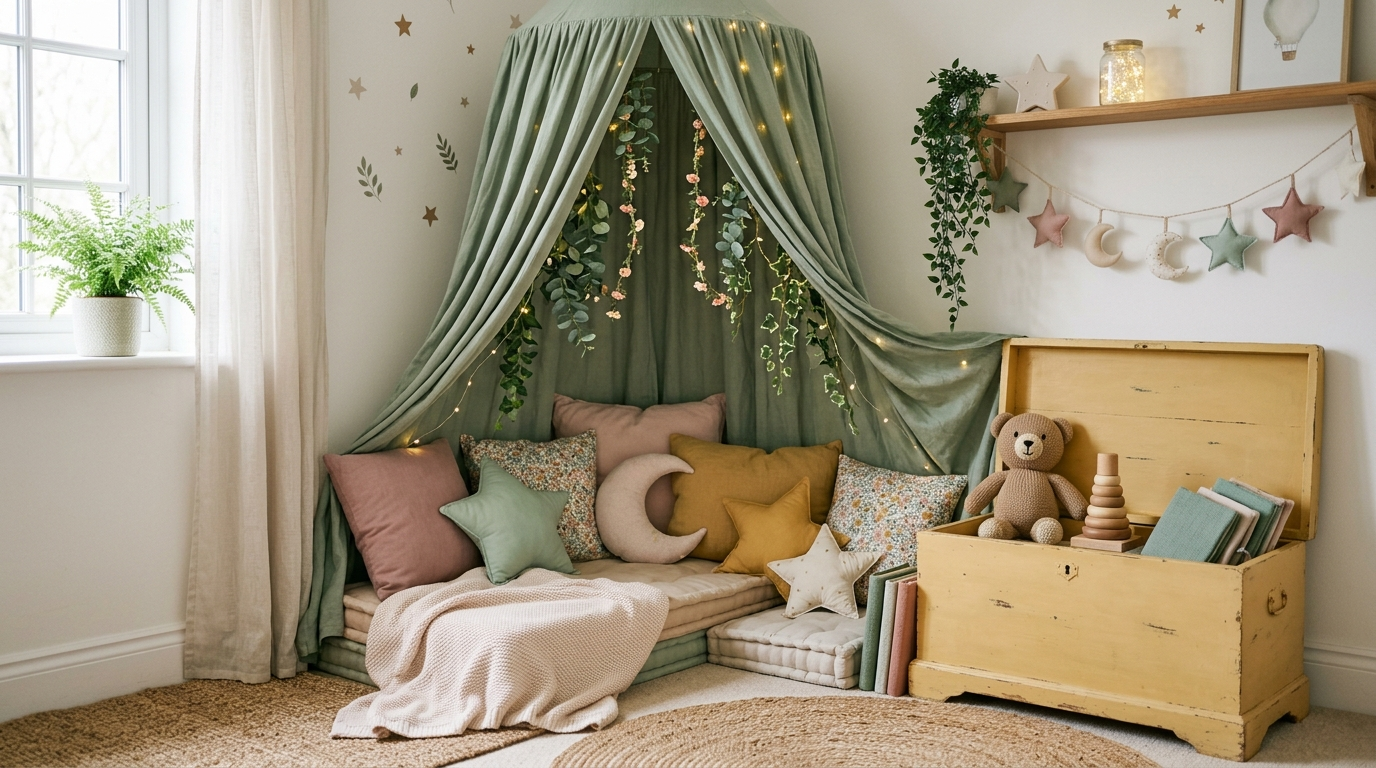
Welcoming a new life into the world is a momentous occasion, and preparing the nursery is one of the most joyous parts of the journey. While store-bought furniture and matching decor sets are convenient, injecting your own creativity and love through Do-It-Yourself projects brings an unparalleled sense of warmth and magic to the room. A nursery should be more than just a place to sleep; it should be a sanctuary of imagination, a space that sparks curiosity, and a cozy haven that comforts both parent and child. In this extensive guide, we will dive deep into whimsical, imaginative DIY projects that will transform an ordinary room into an extraordinary wonderland. From cascading canopies to interactive sensory installations, these projects are designed to be safe, beautiful, and deeply personal.Project 1: The Whimsical Woodland CanopyA bed canopy instantly adds a touch of fairytale magic to any nursery, creating a secure, cozy nook for sleeping or reading. Instead of purchasing a generic tulle tent, crafting a woodland-inspired canopy allows you to customize the fabrics and embellishments. Start with a sturdy wooden embroidery hoop or a lightweight hula hoop as your base. Choose yards of soft, breathable fabrics like organic cotton muslin, sheer organza, or lightweight linen in earthy tones—sage greens, soft dusty roses, or warm terracotta. Drape and secure the fabric over the hoop, allowing it to pool elegantly on the floor. To elevate the whimsical factor, hot-glue artificial ivy vines, delicate silk wildflowers, or felt leaves around the hoop. Suspend it safely from the ceiling using heavy-duty ceiling hooks and sturdy ribbons. The result is a magical forest hideaway right in the corner of the room.
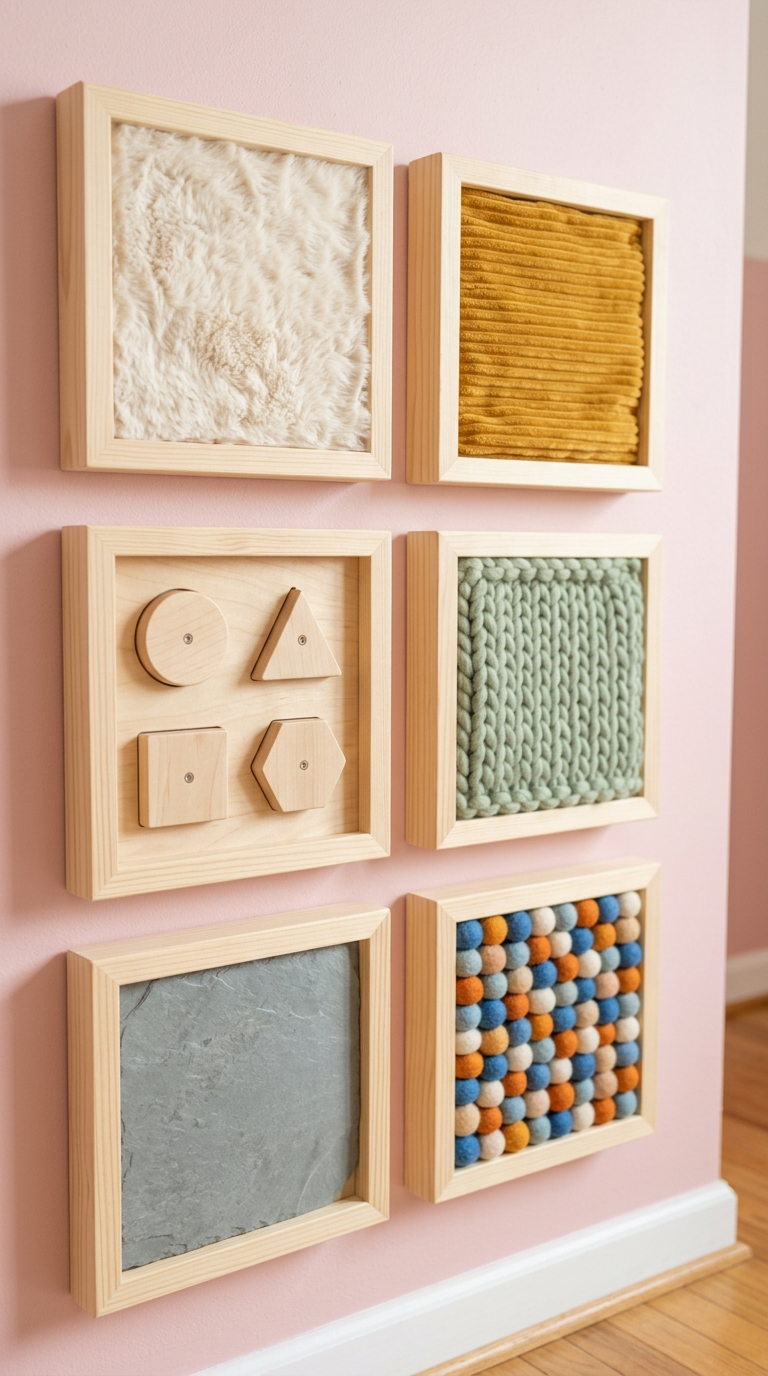
Project 2: The Tactile Sensory Accent WallBabies and toddlers learn about their world through touch. A sensory accent wall is not only a visually stunning piece of decor but also a vital developmental tool. Choose a small section of a wall, perhaps near the changing table or a low play area. Instead of just paint or wallpaper, create a collage of textures. You can frame large squares of different fabrics: fluffy faux fur, smooth velvet, ribbed corduroy, and bumpy boucle. Secure wooden geometric blocks, large smooth wooden buttons, and perhaps a shatterproof acrylic mirror for self-discovery. Ensure every element is bolted or glued with industrial-strength adhesive to prevent any choking hazards. This interactive wall will keep your little one engaged and fascinated, turning a plain surface into a playground for their developing senses.Project 3: Painting a Starry Night Constellation CeilingWhy stare at a blank white ceiling when you can give your child the universe? Painting a constellation ceiling is a deeply impactful DIY that requires patience but yields breathtaking results. Start by painting the ceiling a deep, rich navy blue or twilight indigo. Once dry, map out real constellations or invent your own whimsical shapes using a light pencil. The secret to a glowing night sky is using high-quality, non-toxic glow-in-the-dark paint. Use different sized dotting tools (the ends of paintbrushes work perfectly) to create stars of varying magnitudes. Add sweeping streaks of watered-down metallic gold or silver paint to mimic the Milky Way. During the day, the ceiling looks like a sophisticated deep blue; at night, it transforms into an enchanting, glowing cosmos that will soothe your child to sleep.
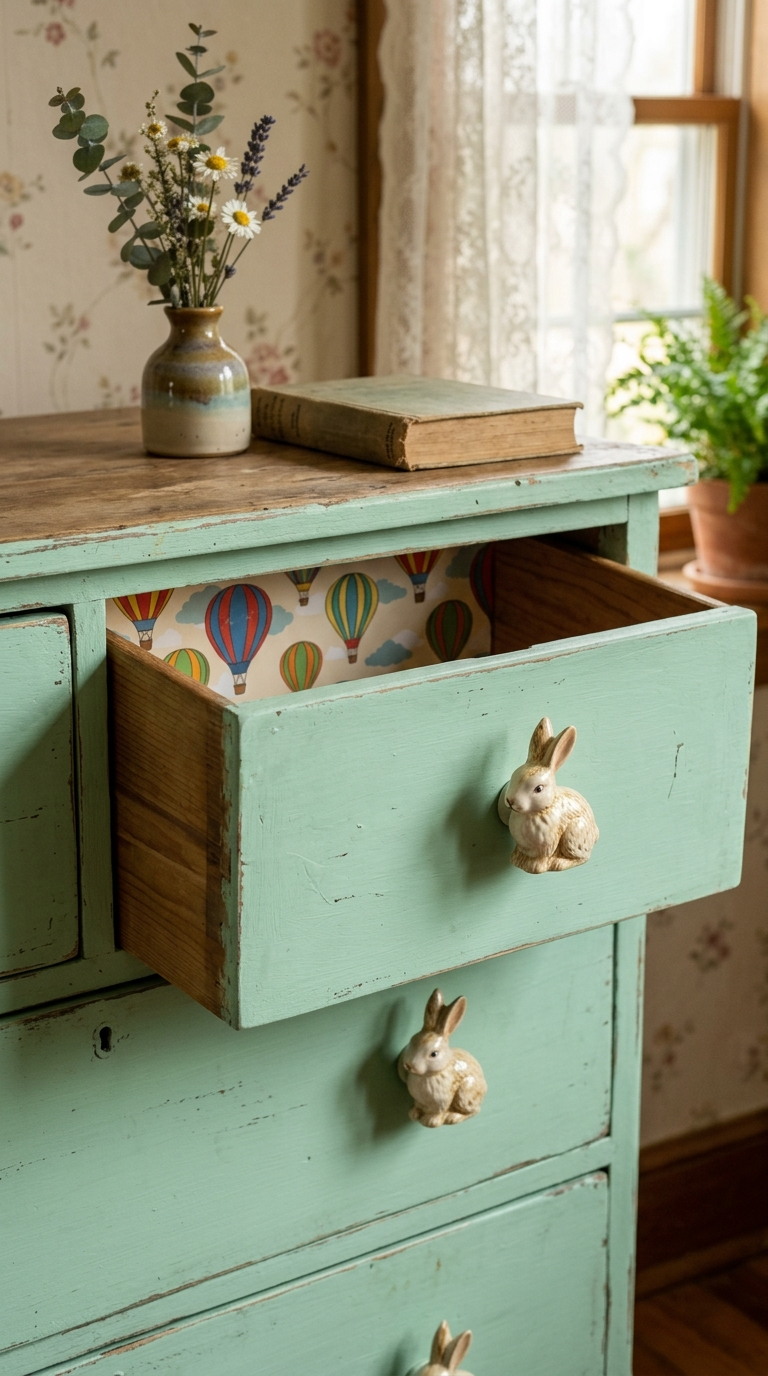
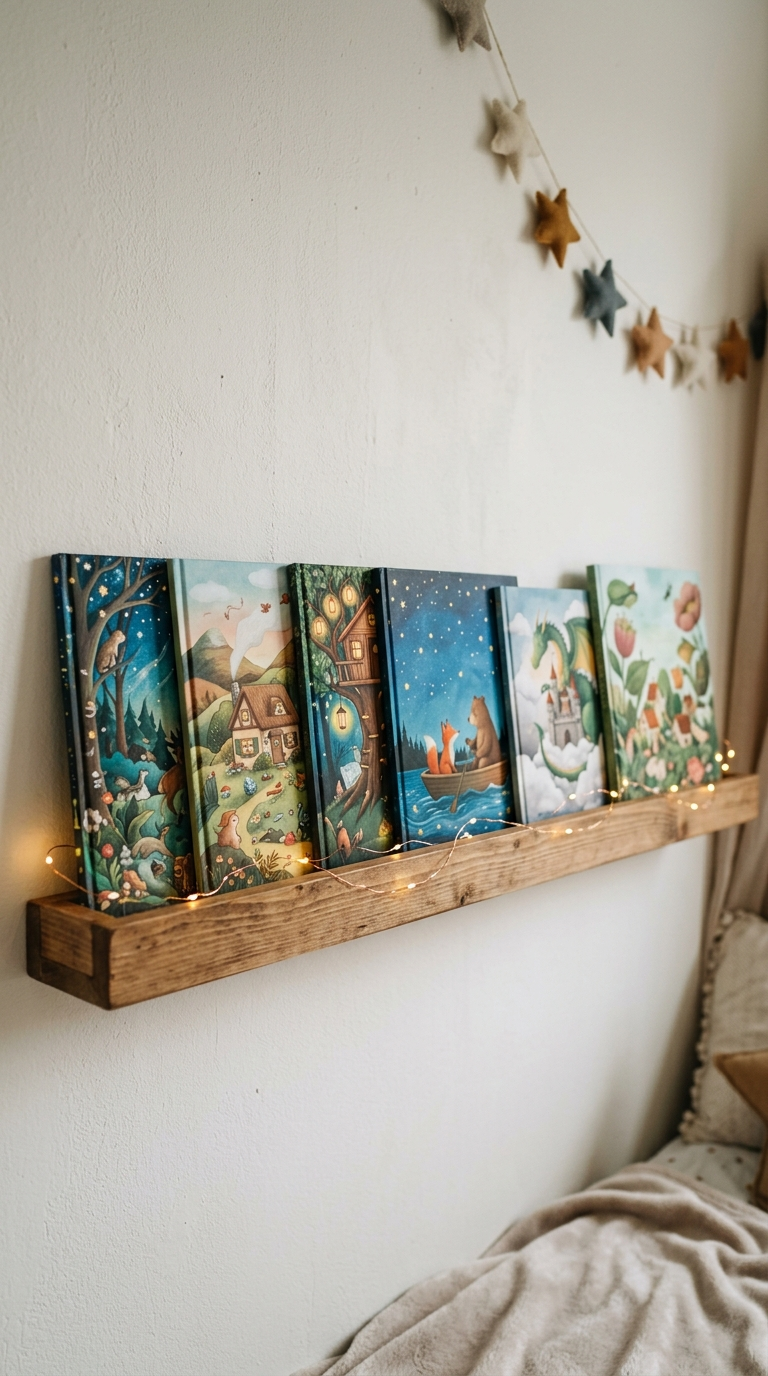
Project 4: Upcycling Vintage Furniture with WhimsyNew furniture lacks the character and history of vintage pieces. Searching thrift stores or utilizing family heirlooms for a dresser or toy chest is both sustainable and charming. The key is in the transformation. Sand down an old wooden dresser and paint it in a soft, whimsical pastel shade—think mint green, lavender, or butter yellow. Replace the standard hardware with something magical: ceramic knobs shaped like woodland creatures, brushed brass stars, or even polished agate slices. For a truly unique touch, line the inside of the drawers with vibrant, illustrative wallpaper featuring hot air balloons, enchanted forests, or vintage storybook characters. Every time you open a drawer, you are greeted with a delightful surprise.Project 5: Crafting an Interactive, Cozy Reading NookFostering a love for reading begins early. A dedicated reading nook encourages quiet time and imagination. You do not need a lot of space; a corner is perfect. Start with a plush, oversized floor cushion or a customized mini-mattress covered in a durable, washable fabric. Above the cushion, install low-profile floating picture ledges. Unlike traditional bookshelves, these ledges display the covers of the books facing outward, making it easy for toddlers to choose their favorite stories by recognizing the artwork. Drape a string of soft, warm-toned fairy lights (battery-operated for safety) around the shelves. Add a basket filled with tactile stuffed animals that can act as reading buddies. This cozy corner will quickly become the most loved spot in the house.
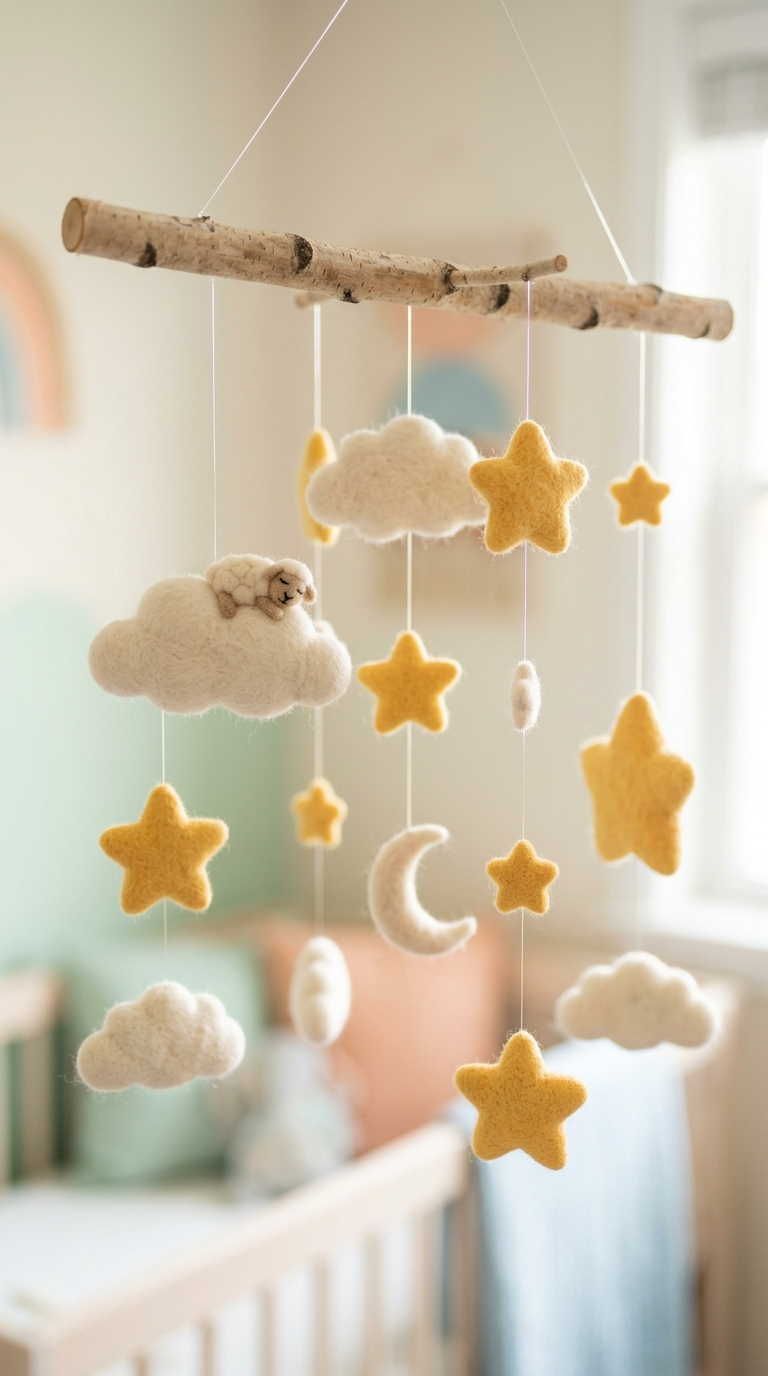
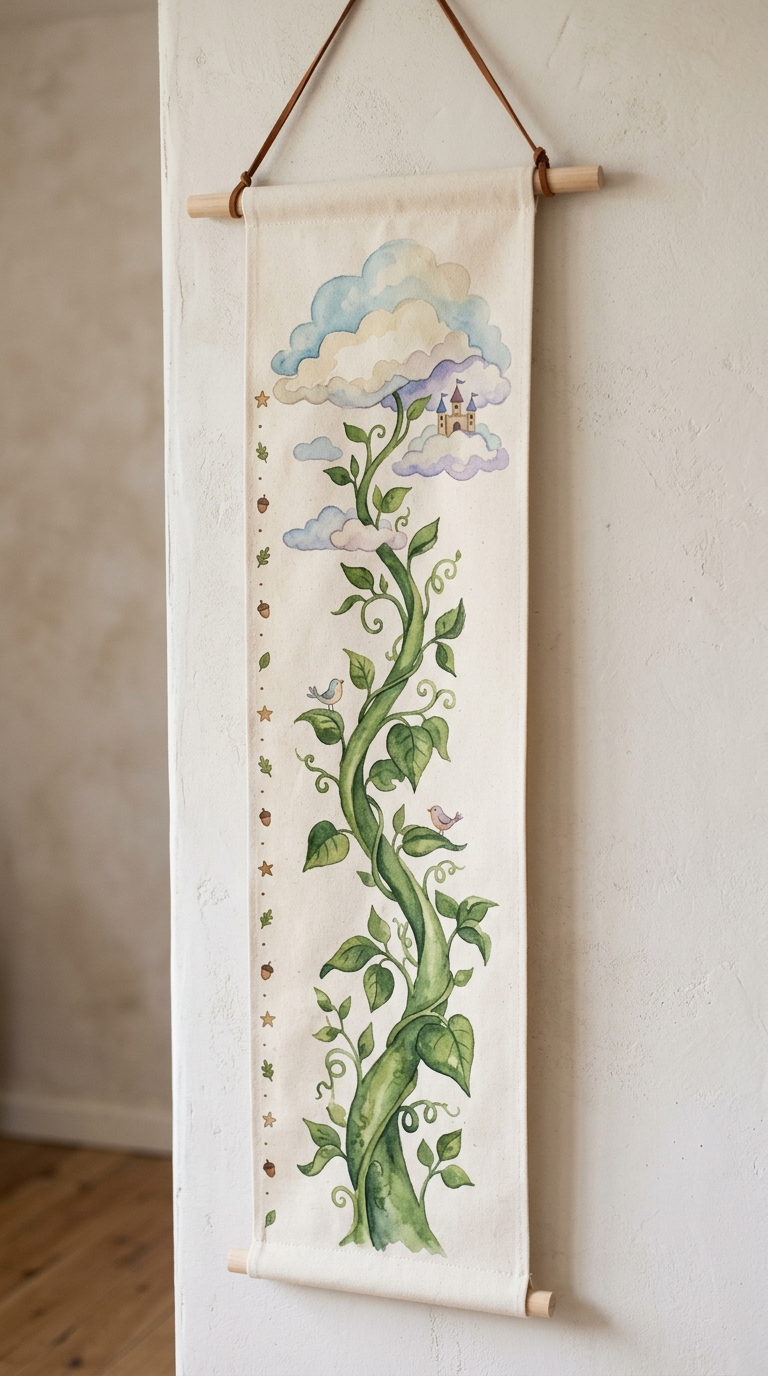
Project 6: Hand-Painted Canvas Growth ChartTracking your child’s growth is a treasured tradition. Rather than marking a doorframe you might one day leave behind, create a portable, heirloom-quality growth chart. Purchase a long, thick canvas banner. Using fabric paints or high-quality acrylics, design a theme that matches your whimsical aesthetic. It could be a towering beanstalk, a stack of teetering storybooks, a giraffe reaching for the leaves, or a rocket ship ascending to the moon. Carefully measure and mark the inches or centimeters along the edge using a ruler and a permanent fabric pen. Hang it with a beautiful wooden dowel and leather string. This project not only serves a practical purpose but becomes a personalized piece of art that you can roll up and keep forever.Project 7: Customizing the Nursery MobileThe mobile is often the first thing a baby gazes at, making it a focal point of the crib area. DIYing a mobile allows for ultimate creativity. Begin with a wooden hoop or a natural, smoothed branch found in your garden. Craft the hanging elements using felt, wool roving, or stiff cardstock. If you chose a sky theme, craft fluffy wool clouds and needle-felted yellow stars. For an earth theme, sew tiny felt birds and green leaves. Suspend these elements using transparent fishing line so they appear to be magically floating in mid-air. The gentle movement of these handmade figures will captivate your baby, providing visual stimulation and a soothing focal point as they drift off to sleep.
Safety First: Crucial DIY ConsiderationsWhile creativity is the heart of these projects, safety must always be the foundation. When creating DIY pieces for a nursery, vigilance is required. Always use Zero-VOC (Volatile Organic Compound) or Low-VOC paints and finishes to ensure the air quality in the room remains pure and safe for tiny lungs. Check and double-check that anything hung on the wall or ceiling—especially above the crib or changing table—is securely anchored into a wall stud, not just drywall. Avoid using small, easily detachable items like beads or loose buttons on anything within the child’s reach to prevent choking hazards. Keep all cords, including blind cords and fairy light strings, completely out of reach. A whimsical room is only truly magical if it is entirely safe.Balancing Whimsy with PracticalityIt is easy to get swept up in the fantasy of designing a magical space, but a nursery must also function flawlessly for the parents during exhausting 3 AM feedings and rapid diaper changes. Ensure that your whimsical elements do not obstruct your workflow. Keep the pathway between the door, the crib, and the changing station completely clear of rugs that might slip or decorative items that could be tripped over in the dark. Incorporate ample, easily accessible storage for diapers, wipes, and burp cloths that blend seamlessly into the decor—perhaps using woven seagrass baskets or vintage painted wooden crates. Beautiful design and practical utility must go hand in hand.
The Joy of Creating an Evolving SpaceOne of the greatest benefits of a DIY approach to a nursery is the ability to easily adapt the space as your child grows. The woodland canopy that hovered over the crib can be moved to the corner to become a reading tent for a toddler. The interactive sensory wall can be updated with more complex latches, locks, and puzzles. When designing these projects, think about their longevity. Choose colors and themes that are imaginative but not excessively babyish, allowing the room to transition gracefully from a nursery into a toddler’s room, and eventually into a young child’s creative haven.Conclusion: A Labor of LoveCreating a whimsical and imaginative nursery through DIY projects is a profound expression of love and anticipation. It is about crafting an environment that feels deeply personal, uniquely yours, and filled with wonder. Each brushstroke on the ceiling, every stitch on the mobile, and the careful selection of textures on a sensory wall are investments in your child’s early experiences. Embrace the process, allow your own inner child to dictate the creative choices, and do not worry about perfection. The magic lies in the handmade charm and the beautiful, imaginative sanctuary you have built for your newest family member.
Learn how to master the art of layering textures and fabrics to build a deeply comforting, visually stunning bedroom sanctuary that invites perfect sleep.
Stop letting poor design ruin your focus. Avoid these critical home office mistakes to create a productive, ergonomic, and beautiful workspace that inspires.
Discover how to transform your home office into a cozy productivity oasis. Explore layout tips, ergonomic solutions, and decor ideas to inspire your best work.
Are you making these common bedroom design mistakes? Learn how to fix your sleeping space, optimize flow, and create a truly minimalist, serene retreat.
Create a serene retreat with these stunning minimalist bedroom ideas. Embrace clean lines, neutral palettes, and clever organization for ultimate peace.
Discover imaginative and whimsical DIY projects to transform your child’s nursery into a magical wonderland. Easy steps for creating personalized kids spaces.